MHS & MSHS students and staff share what their favorite Christmas treats are
December 20, 2021
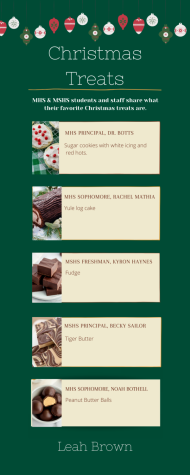
Sugar cookies with white frosting and red hots:
Frosting
1/2 cup butter; at room temperature
1/2 cup shortening (I used butter flavored)
1 teaspoon vanilla extract
1/2 teaspoon almond extract
pinch of salt
4 cups powdered sugar
2-3 tablespoons milk (more/less for desired consistency)
food coloring, if desired
Bag of Red Hots
Cookies
Preheat oven to 350 degrees. In a large bowl with an electric mixer, cream butter and sugar until fluffy. Add eggs, one at a time, mixing after each egg. Add in vanilla.
In a separate bowl whisk together flour, salt, and baking soda. Gradually add to wet ingredients and mix just until combined.
If the dough is too sticky, place it in the refrigerator to firm up a bit. (I put in the frig while I cleaned up the counter.) Then, use a cookie scooper or tablespoon to drop dough onto the cookie sheet. Using a drinking glass, dip the bottom in a bowl with sugar, and lightly flatten the cookie with the cup. This puts a nice sugary topping on the cookie.
Bake at 350 degrees for 8-12 min, until light golden brown. Cool completely before frosting.
Recipe from: https://whatchamakinnow.blogspot.com/2014/12/red-hot-frosted-sugar-cookies.html
Yule log cake:
Preheat oven to 350°F. Line a 17×12 inch jelly roll sheet pan with parchment paper. Make sure the parchment paper sticks up at least an inch above the sides of the pan on all sides. You’ll use the parchment paper later to lift the cake out of the pan and roll it up.
Whisk the flour, cocoa, baking powder, and salt together in a medium bowl and set aside.
In a large bowl, combine the egg yolks and sugar and whisk together until well combined.
Add the sour cream, melted butter, and vanilla extract and whisk together until well combined.
Add the dry ingredients and gently whisk together until well combined, then set aside.
Add the egg whites to a large mixer bowl and whip at high speed until stiff peaks form.
Gently fold about 1/3 of the whipped egg whites into the chocolate mixture to loosen up the batter.
Add the remaining egg whites and gently fold together until well combined.
Spread the cake batter evenly into the prepared pan and bake for 10-12 minutes, or until the top of the cake springs back when touched and a toothpick inserted comes out clean.
Remove the cake from the oven and immediately lift the cake out of the pan using the parchment paper and place it on the counter.
While the cake is hot, use the parchment paper the cake was baked in and start at the shorter end of the cake to slowly roll the cake up. Set the cake aside to cool completely.
When the cake has cooled and is ready to be filled, make the filling. Add the heavy whipping cream, powdered sugar, vanilla extract, and salt to a large mixer bowl and whip on high speed until soft peaks form.
Add the mascarpone cheese to the whipped cream and whip until stiff peaks form. It will happen fairly quickly.
Unroll the cake roll very carefully, looking out for areas where it may be sticking to release it. You can use an offset spatula or something similar and run it along with the parchment paper as you unroll the cake to help release it as it unrolls.
Spread the filling evenly onto the unrolled cake, then roll it back up without the parchment paper.
Wrap it up in a plastic wrap with the seam side down and refrigerate for at least an hour to firm up.
When you’re ready to decorate the cake, make the chocolate ganache. Add the chocolate to a medium-sized bowl and set it aside. Heat the cream in the microwave just until it begins to boil, then pour it over the chocolate.
Allow the chocolate and cream to sit for a few minutes, then whisk until smooth. Let the ganache cool to about room temperature (or cooler, you don’t want it too warm/thin), then transfer to a large mixer bowl.
Whip on high speed until lightened in color and thick enough to spread.
To decorate the cake, use a large serrated knife to gently cut off a piece of the log about 3 inches in length. Make the cut with a slight diagonal.
Use some of the chocolate ganache to attach the small log to the side of the larger log.
Spread the remaining chocolate ganache all over the cake, then use a fork to create bark-like lines all over it. Decorate with sugared cranberries and rosemary (instructions in notes), if desired.
Refrigerate the cake until ready to serve.
Fudge:
Step 1
Place chocolate chips, sweetened condensed milk, and butter or margarine in a large microwaveable bowl. Zap in microwave on medium until chips are melted, about 3-5 minutes, stirring once or twice during cooking. Stir in nuts, if desired.
Step 2
Pour into a well-greased 8×8-inch glass baking dish. Refrigerate until set.
Recipe from: https://www.allrecipes.com/recipe/9368/fudge/
Tiger Butter:
Tiger Butter is SO easy to make! First, assemble your ingredients. You’ll need semi-sweet chocolate chips, white chocolate chips, and creamy peanut butter. I think chunky peanut butter would taste good in this recipe, but the swirls wouldn’t look nearly as pretty, so I use creamy peanut butter.
Melt the white chocolate chips in the microwave. You can also heat the peanut butter for 30 seconds. Combine the two ingredients and stir gently until smooth and well combined. Place a piece of parchment paper on a cookie sheet. Pour the peanut butter mixture onto the parchment paper. Use a rubber scraper to smooth the mixture out into a rectangle shape. It’s okay if it doesn’t reach the sides of the pan.
Heat the semi-sweet chocolate chips until melted and smooth. Spoon dollops of chocolate out in lines over the peanut butter mixture. Once all of the chocolate is transferred, use a sharp knife in long, smooth strokes to swirl the chocolate until your desired design is achieved. Sometimes I swirl it more, other times less, but it’s always fun! Let chocolate cool to set, then cut into 1.5″ squares.
Recipe from: butterwithasideofbread.com/tiger-butter-fudge/
Peanut Butter Balls:
You’ll start by mixing the butter and peanut butter together until well combined. Then mix in the powdered sugar, vanilla extract, and salt. I suggest stopping to scrape down the sides of the bowl as needed to make sure everything is well combined.
Once you’ve mixed up the filling, you’ll scoop the mixture and roll it into balls. I like to use a one tablespoon measuring spoon or cookie scoop for this part because it makes the perfect sized peanut butter balls.
As you’re rolling them, I suggest placing them on a baking sheet lined with parchment paper because you’ll need to freeze these before you coat them in chocolate. I find that about 20 minutes is enough time for them to firm up and make it easy to dip.
Once the balls are frozen, you’ll coat them in some chocolate. I used semi-sweet chocolate for this recipe because it’s not too sweet and not too bitter. If you love white chocolate or dark chocolate feel free to use that instead!
If you don’t have any dipping tools, you can easily coat the peanut butter balls in chocolate using a fork and toothpick. Simply toss each one into the chocolate until fully coated, use a fork to lift them out of the bowl, tap the fork on the edge of the bowl to remove any excess chocolate, then use a toothpick to slide them off of the fork onto a baking sheet lined with parchment paper.
Once they’re all coated in chocolate, you will want to refrigerate them for 45 minutes to an hour so the chocolate can harden. Once they’re ready, you can either enjoy them or leave them in the refrigerator or freezer until you’re ready to serve them!
Recipe from: https://www.livewellbakeoften.com/peanut-butter-balls/